
Introduction
Pi Camera module is a camera which can be used to take pictures and high definition video.Raspberry Pi Board has CSI (Camera Serial Interface) interface to which we can attach PiCamera module directly.
This Pi Camera module can attach to the Raspberry Pi’s CSI port using 15-pin ribbon cable.
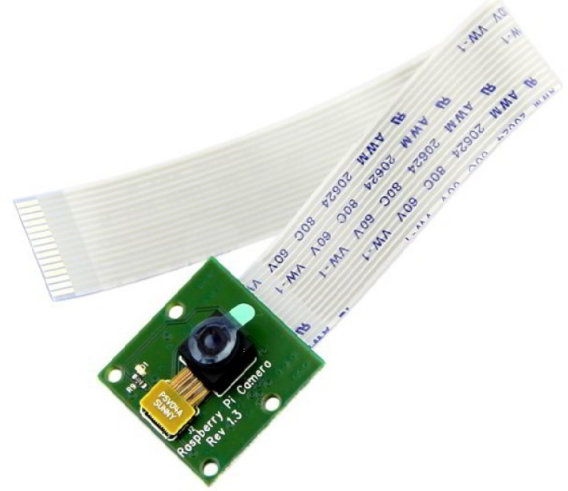
Pi Camera Module (v1.3)
Features of Pi Camera
Here, we have used Pi camera v1.3. Its features are listed below,
- Resolution – 5 MP
- HD Video recording – 1080p @30fps, 720p @60fps, 960p @45fps and so on.
- It Can capture wide, still (motionless) images of resolution 2592×1944 pixels
- CSI Interface enabled.
How to attach Pi Camera to Raspberry Pi?
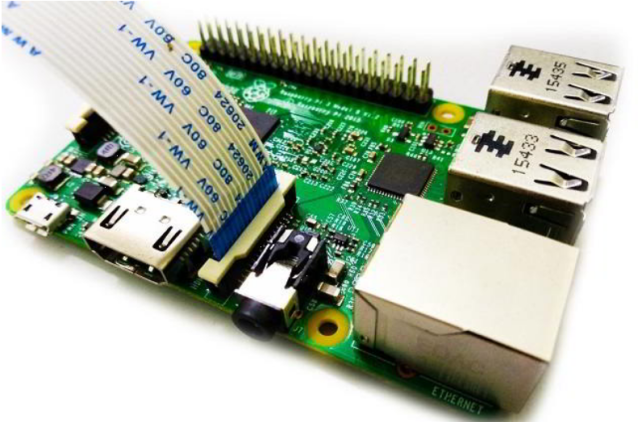
Connect Pi Camera to CSI interface of Raspberry Pi board as shown below,
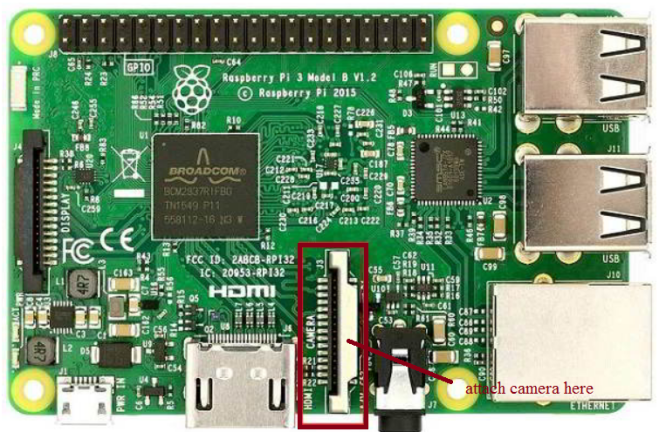
To connect the camera module, find the camera ribben cable port, behind the ethernet port. To “open” it, use your fingers on the two tabs on the edge and pull gently up, it should come up very easily. When up, you can slide in the ribben cable, then press back down on the same tabs to lock the cable in place:
Now, we can use Pi Camera for capturing images and videos using Raspberry Pi.
Before using Pi Camera, we need to enable camera for its working.
Enabling Camera module
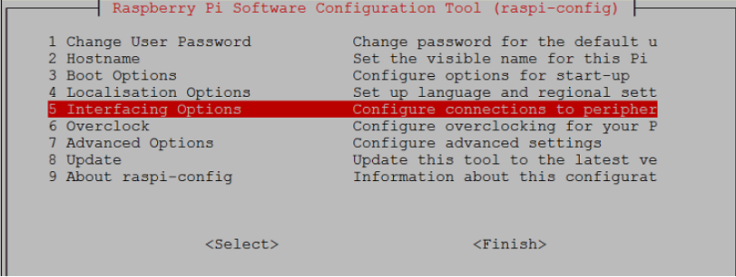
For enabling camera in Raspberry Pi, open raspberry pi configuration using following command,
sudo raspi-config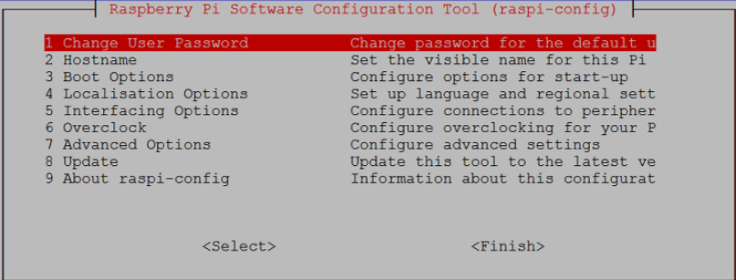
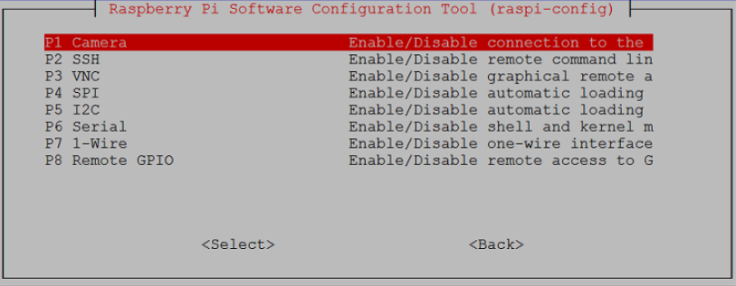
From here, choose the interfacing options:
Then the camera:
Yes to enable, and then go ahead and reboot:
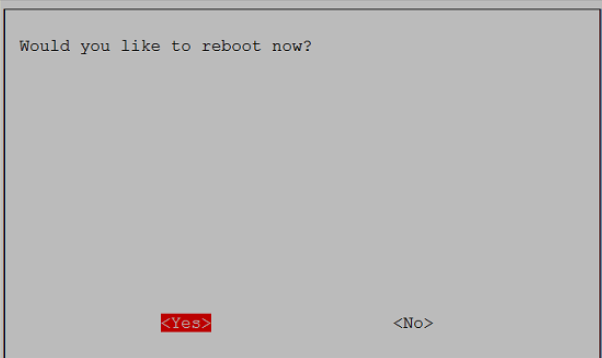
Now we can access camera on Raspberry Pi.
Now we can capture images and videos using Pi Camera on Raspberry Pi
Code
Open Python 3 or python 2 from the main menu: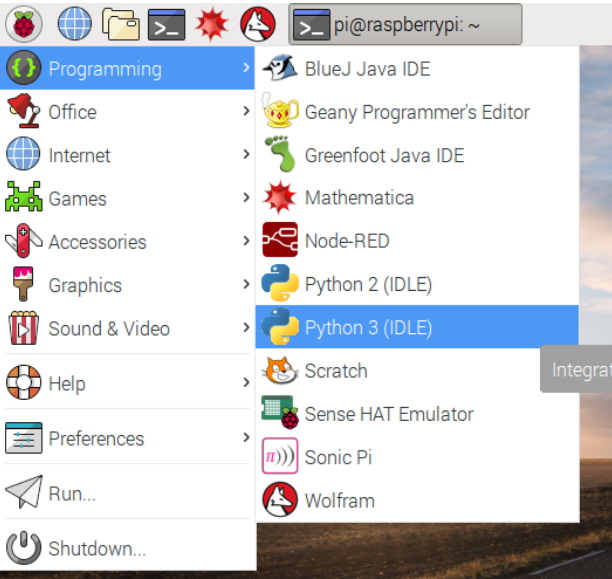
Open a new file and save it as camera.py. It’s important that you do not save it as picamera.py.
Enter the following code:
from picamera import PiCamera
from time import sleep

camera = PiCamera()

camera.start_preview()
sleep(10)
camera.stop_preview()
Save with Ctrl + S and run with F5. The camera preview should be shown for 10 seconds, and then close.
Program for Image Capture
from picamera import PiCamera
from time import sleep

camera = PiCamera()
camera.start_preview()
sleep(5)
camera.capture('/home/pi/Desktop/image.jpg')
camera.stop_preview()
It’s important to sleep for at least 2 seconds before capturing, to give the sensor time to set its light levels.
Run the code and you’ll see the camera preview open for 5 seconds before capturing a still picture. You’ll see the preview adjust to a different resolution momentarily as the picture is taken.
You’ll see your photo on the Desktop
Code Explanation
To use picamera python based library we have to include it in our program as given below
from picamera import PiCameraThis picamera library has PiCamera class for camera module. So, we have to create object for PiCamera class.
sleep()
from time import sleep
this is time library to stop the code for desired time we want
start_preview()
It displays the preview overlay of default or specified resolution.
Example Camera.start_preview()
capture()
It is used to capture images using Pi Camera.
E.g. camera.capture('/home/pi/Desktop/image.jpg')
stop_preview()
It is used to close the preview overlay.
E.g. camera.stop_preview()
Recording video
Now you’ve used the camera to take still pictures, you can move on to recording video.
from picamera import PiCamera
from time import sleep
camera = PiCamera()
camera.start_preview()
camera.start_recording('/home/pi/random.h264')
sleep(10)
camera.stop_recording()
camera.stop_preview()
Run the code; it will record 10 seconds of video and then close the preview.
Code explanation
We have to create object for PiCamera class. Here, we have create object as camera.
start_recording()
It is used to start video recordingand store it.
E.g. camera.start_recording('/home/pi/random.h264')
It records video named random of h264 format.
stop_recording()
It is used to stop video recording.
E.g.camera.stop_recording()
Play Recorded Video
To open video, we can use omxplayer by using following command,
omxplayer video_name

Leave a comment