
LEDs are small, powerful lights that are used in many different applications. To start, we will work on blinking an LED, . It is as simple as turning a light on and off.
Components Required
You will need the following components −
- 1 × Breadboard
- 1 × Arduino Uno R3
- 1 × LED
- 1 × 220Ω Resistor
- 2 × Jumper
Schematic
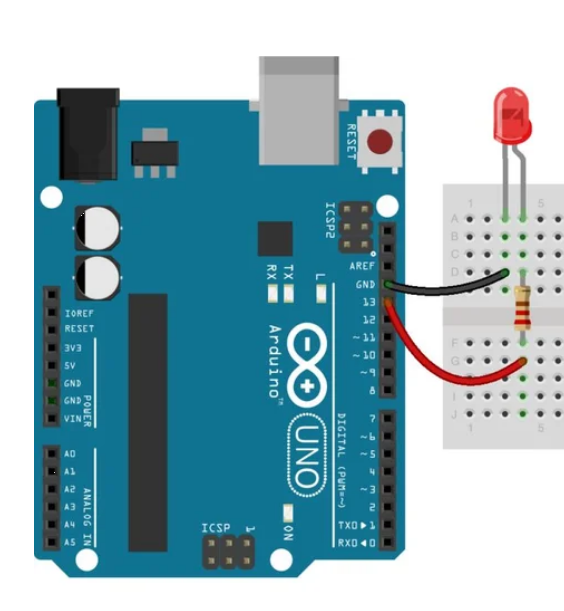
Follow the circuit diagram and hook up the components on the breadboard as shown in the image given below.

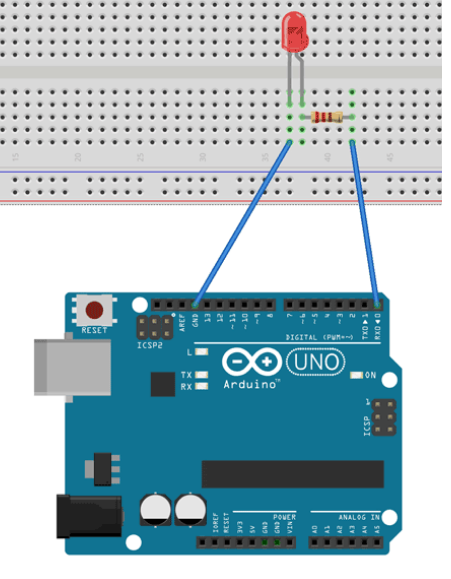
Connect the LED as Shown in given Image with 220 ohm resistor and LED.
Arduino’s pin 13 connected to positive leg of LED through resister
Arduino’s GND connected to negative leg of LED.
Sketch
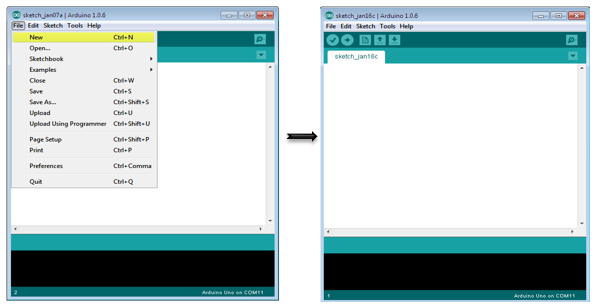
Open the Arduino IDE software on your computer. Coding in the Arduino language will control your circuit. Open the new sketch File by clicking New.
Code
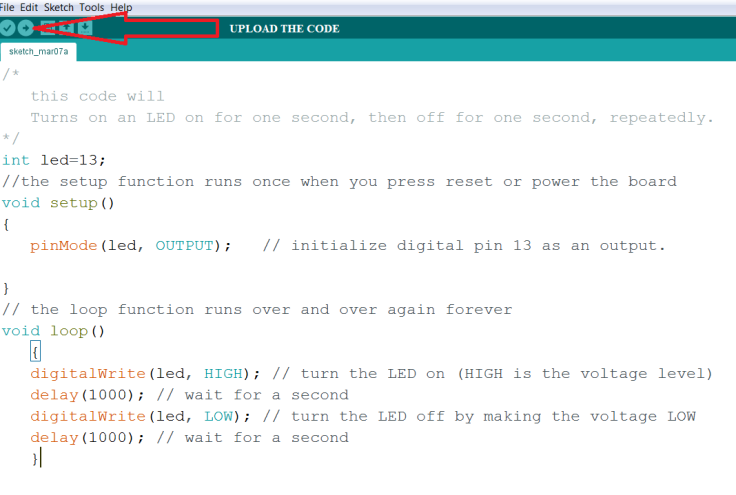
write this code in Arduino ide and compile.
/*
this code will
Turns on an LED on for one second, then off for one second, repeatedly.
*/
int led=13;
//the setup function runs once when you press reset or power the board
void setup()
{
pinMode(led, OUTPUT); // initialize digital pin 13 as an output.

}
// the loop function runs over and over again forever
void loop()
{
digitalWrite(led, HIGH); // turn the LED on (HIGH is the voltage level)
delay(1000); // wait for a second
digitalWrite(led, LOW); // turn the LED off by making the voltage LOW
delay(1000); // wait for a second
}
Code to Note
pinMode(led, OUTPUT) − Before you can use one of Arduino’s pins, you need to tell Arduino Uno R3 whether it is an INPUT or OUTPUT. We use a built-in “function” called pinMode() to do this.
digitalWrite(led, HIGH) − When you are using a pin as an OUTPUT, you can command it to be HIGH (output 5 volts).
digitalWrite(led, LOW) − When you are using a pin as an OUTPUT, you can command it to be LOW (output 0 volts).
Uploading the code
Result
You should see your LED turn on and off. If the required output is not seen, make sure you have assembled the circuit correctly, and verified and uploaded the code to your board.

Leave a comment